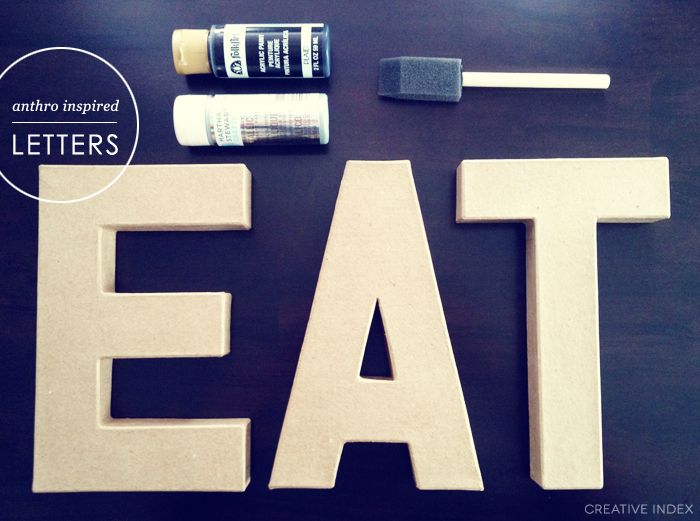
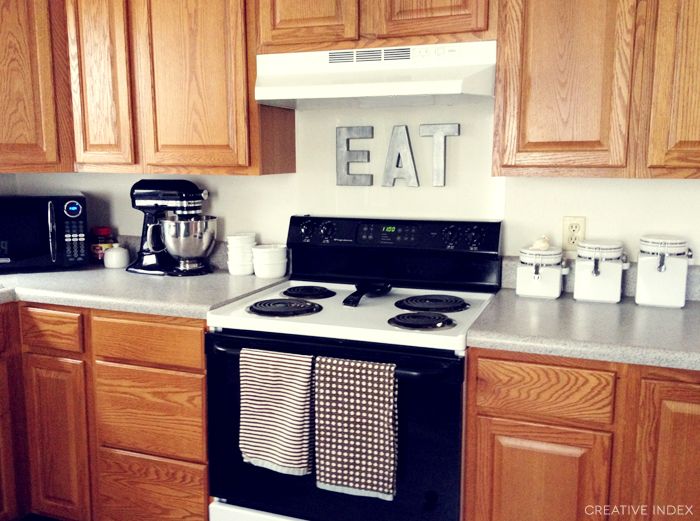
I really wanted to fill in an empty space above our stove, and with family coming into town this week, I made my way to the craft store for some supplies and I made my own.

Want to make them yourself? Here's what you need to do.... it's EASY!
You'll need:
// black acrylic paint
// metallic (or pearl) paint (i like martha stewart)
// paper mache letters
// sponge brushes
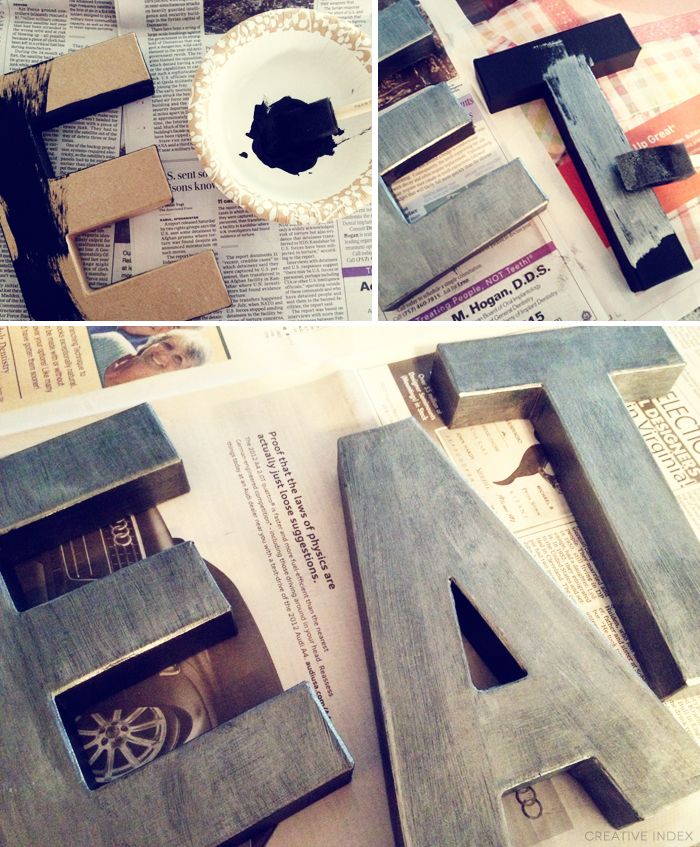
First, paint the letters all black and let them dry completely. Then brush on the metallic paint using long stokes. The silver coat will give the letters a textured look and the matte finish. Let them dry and hang wherever you want! (They're so lightweight, I just used a little masking tape!)


And there ya have it! I L-O-V-E them! They really help to update this outdated kitchen! (one of the downfalls to renting! :-/)
Now I want to make a J and an ampersand for my office!
What do you think? Would you DIY them? Or do you prefer the originals?
And yes, I know there are lots of tutorials floating around Pinterest, but I wanted to share another one! Hope you don't mind! ;)


super cute!
ReplyDeleteI love to share with you this love for bold lettering around the house.
ReplyDeleteGreat Work.
It looks lovely and fun in your wall, exactly how a kitchen should. I see nothing wrong with it, but I'll trust your outdated remark ;). But I concede that the letters kicked the fun of it...
I might DIY because they are even costier for me as they'd have to send it. And I have this tiny space in the wall - between two frames holding old recipe books - that would love that...
Thank you for sharing,
Teresa
What a great project! It turned out great :)
ReplyDeleteI would definitely DIY, I think they look great--- and seriously probably much less expensive :)
ReplyDeleteGreat job and thanks for sharing, I think when we move this fall I'll do something similar!
and I'm loving your blog-- I love the clean, non cluttery layout. it's refreshing.
Stylish indeed! :-)
ReplyDeleteOoh I've been meaning to try this DIY! Your letters look fab in the kitchen!
ReplyDeleteWow! They look great. Such a fun update :)) I'm thinking of doing this in an M for my bedroom. Great job!!
ReplyDeleteReally cool transformation! ;)
ReplyDeleteWow! Great job on this... it definitely adds a little something to a kitchen. :)
ReplyDeleteThank you so much for leaving me a comment on my blog!
Have a wonderful week!
xoxo
Gosh I love how they turned out!!
ReplyDeleteI have L-O-V-E letters painted black, I think I know what to do with them ;)
I love these! you did a great job!
ReplyDeleteLove love love them!!!
ReplyDeleteI Love them!!!!
ReplyDeletethat turned out super cute! i'd make it myself too- who needs to shell out 60 bucks
ReplyDeleteThey are looking great. I can't wait to move and do our new place up.
ReplyDeletesuch a cute an easy diy!! What if you made one that said chocolate or something? haha i'd love it!
ReplyDeleteThis looks great! I have been wanting to do these! Thanks for the easy tutorial now I know exactly what to get. :)
ReplyDeleteWhere did you buy the paper mâché letters? I can't find them at hobby lobby or Michaels!
ReplyDeleteKati: I got mine from JoAnn's. Did you try online? I saw them on Hobby Lobby's and JoAnn's site before...
ReplyDeleteGood luck! Hope you find them! :)
These are great!!!! and top up the kitchen, which is so nice
ReplyDeleteI use a die cutting machine and SVGcuts file for the letters. But first, I have to cut them out and put them together. What a great idea!
ReplyDeleteThanks!
Carmen L
Where did you get your adorable kitchen towels?
ReplyDeleteI got them a few years ago, but they are from Target!
Delete